I have just uploaded a video tour of the van, so please go to https://youtu.be/9zlVHi5RlPo to watch, and give it a like and hit notify if you wish to be notified when I upload again.
Long Time Coming - Update on the Van Build! /
My plans to fully document the build of our van have not gone as I had anticipated. I only manage to find small windows of opportunity to get out and carry out work on the van. As a result I find I do not want to get the camera out and record what I am doing, as it feels like a waste of the time I have. Likewise my photography has also had lower priority until van is built. But fear not slow and steady progress has been made, we are now 13 months into our build, I estimated 12 - 18 months to complete it at the start. I now believe the mundane preparation work is all but complete, well almost more about that later. Now the exciting fitting out works are about to start so read on and I will try to explain in words and pictures where we are.
Purchasing the van, and starting the project at the start of winter, we purchased van November 2018, does have its drawbacks. Working through the winter months with minimal daylight, well non at all in the evenings, and the cold wet weather does hamper progress. During the first winter progress was hindered due to lack of insulation which meant condensation build up was an issue on the walls of the van. Not wanting to trap the moisture behind the insulation resulted us being to a slow start. I have had power (230v mains and 12V) and lights in the van for a while now which helps a bit in terms of working on dark cold evenings, I can have the lights and a heater on however, the larger jobs which have to be done outside are undertaken at weekends, and on days off work, when not committed to doing something else not associated with the van (life sometimes just gets in the way :-) ).

Potted history to date
Until you have a van and start building it you don’t realise that you will want to get in it and take it on trips, not just to buy materials but to start realising the dream of travelling and living out of the van. I was intending to keep you updated on the trips so far I have released one and rafted another, which may be released soon see links below, but as a quick catch up and tell you where we have been -
June 19 - two weeks Cornwall Blog Post
September 19 - Weekend Cornwall
November 19 - one week Cornwall, although we did not sleep in the van.
December 19 - Christmas Day out to Portland Bill

I know there is a travel trend going on here with Cornwall being our go to location, however a point to note is that each of these trips has required works to be undertaken on the van that required us to stop work and carry out temporary fitouts installed so that we could be comfortable when using it.
The Insulation and vapour barrier are 90% complete. I still have to insulate the floor with 25mm Celotex, I want to ensure I have a defined location for the underfloor services and have any fitments in place before the permanent floor is laid, this is my next job which I will expand upon next.
Underfloor services, I have purchased and fitted (big thank you to our son-in-law Nathan in facilitating this) the LPG tank, 25ltrs, from Propex (Link) and also the fresh and waste water tanks as supplied by CAK (Link) I have yet to install the pipework for these but will do when the weather improves. The water heater (Link), heater (Link ) and pump (Link) all supplied by Propex are also purchased and await fitting, again when weather improves. The water heater will be under the van but heater and pump will be inside the habitation area as there is no available space underneath unless I wanted to ‘loose’ the spare wheel.
Ply Lining for all but the doors is complete, I have cut the ply for the doors but we have decided on a couple of changes the require some of these to be redone.
First of all initially we were going to have curtains across the rear windows, which we have used on trips up to now, but these do come with challenges. Making a curtain that has thermal capabilities and also give us the blackout capability we want felt like a compromise in our situation we therefore decided to use blinds (Link) these provide us with thermal and blackout properties. The offside blind is done but the near side sliding door cladding needs to be recut to suit the blind installed. Later, If we decide we still require curtains for the ‘homely’ feel we can add these external to the blinds.
Secondly the rear door cladding, having just cladded the doors there is a large void between them. When we visited a motorhome show we noticed some of the manufactures had extended the cladding over this gap resulting in a more complete feel so I need to redo the nearside rear door cladding to cover the gap.
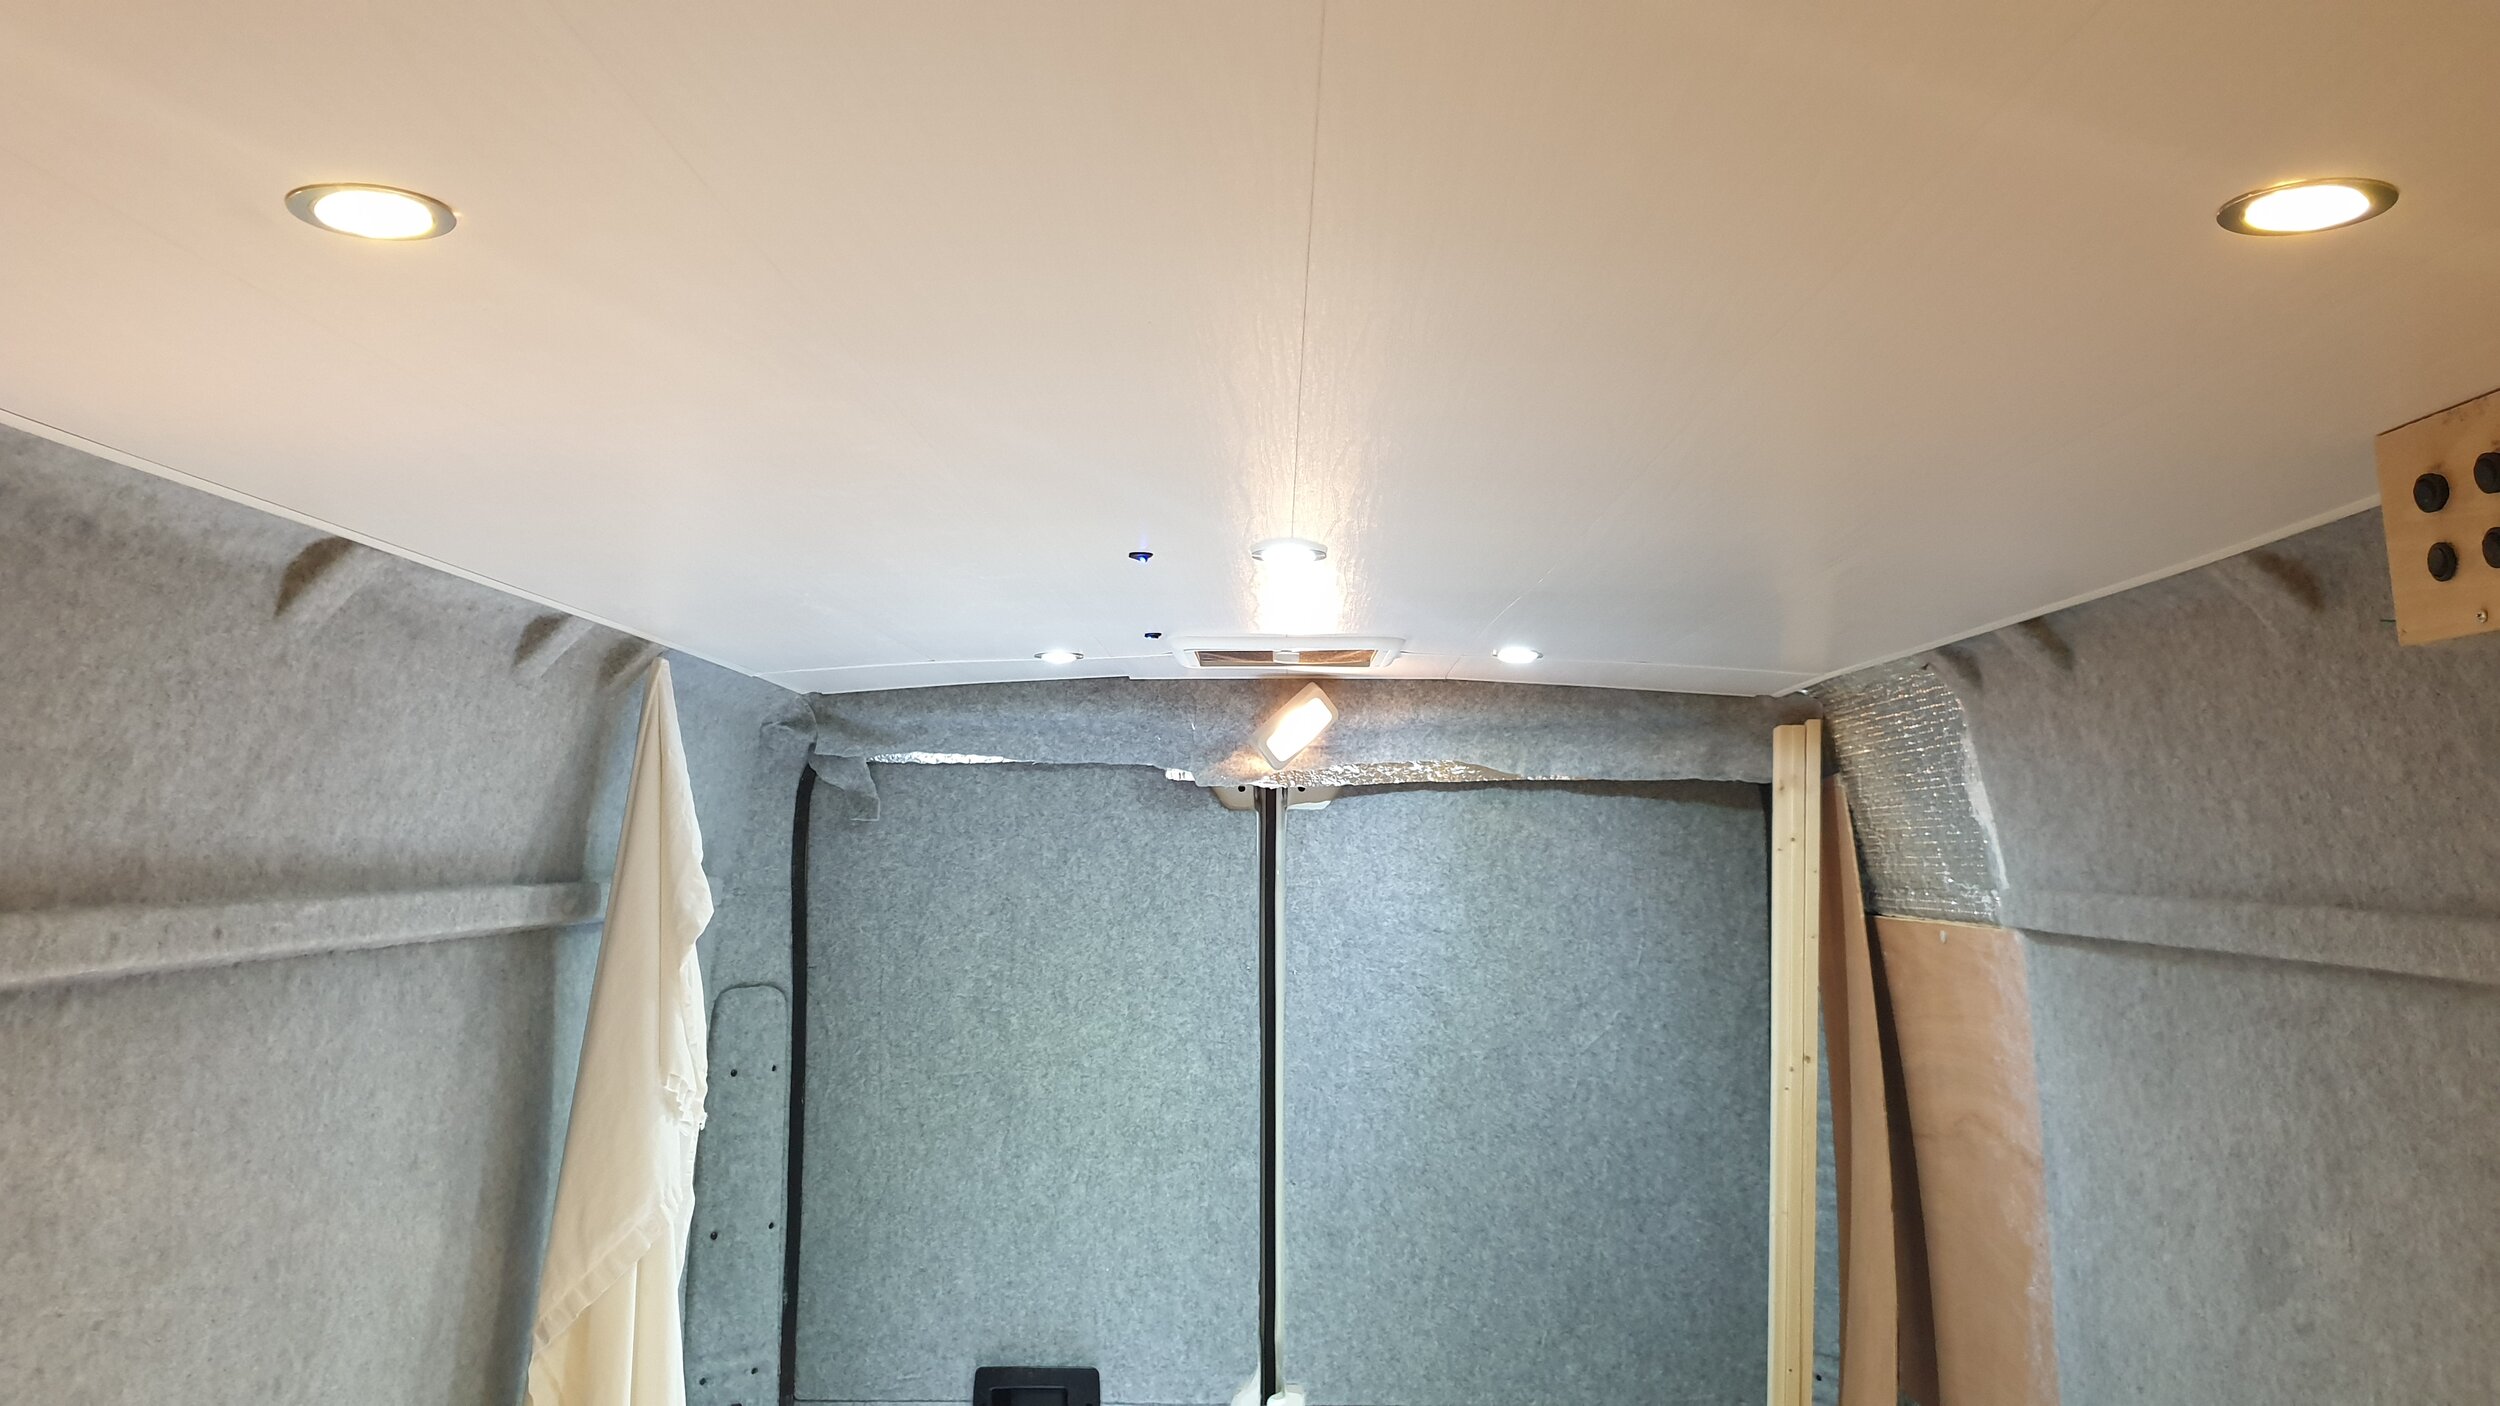
The cladded walls of the van have now been finished with a silver 4 way strech carpet material from EBay (Link) this covers all the walls and exposed metalwork for, we think, a plush feel. Both the van sides were carpeted in a single piece of the material for a complete effect. For the ceiling we have used 5mm white plastic cladding from Claddtech.com (Link) which is very lightweight and we chose white to hopefully make the space feel bright and airy.
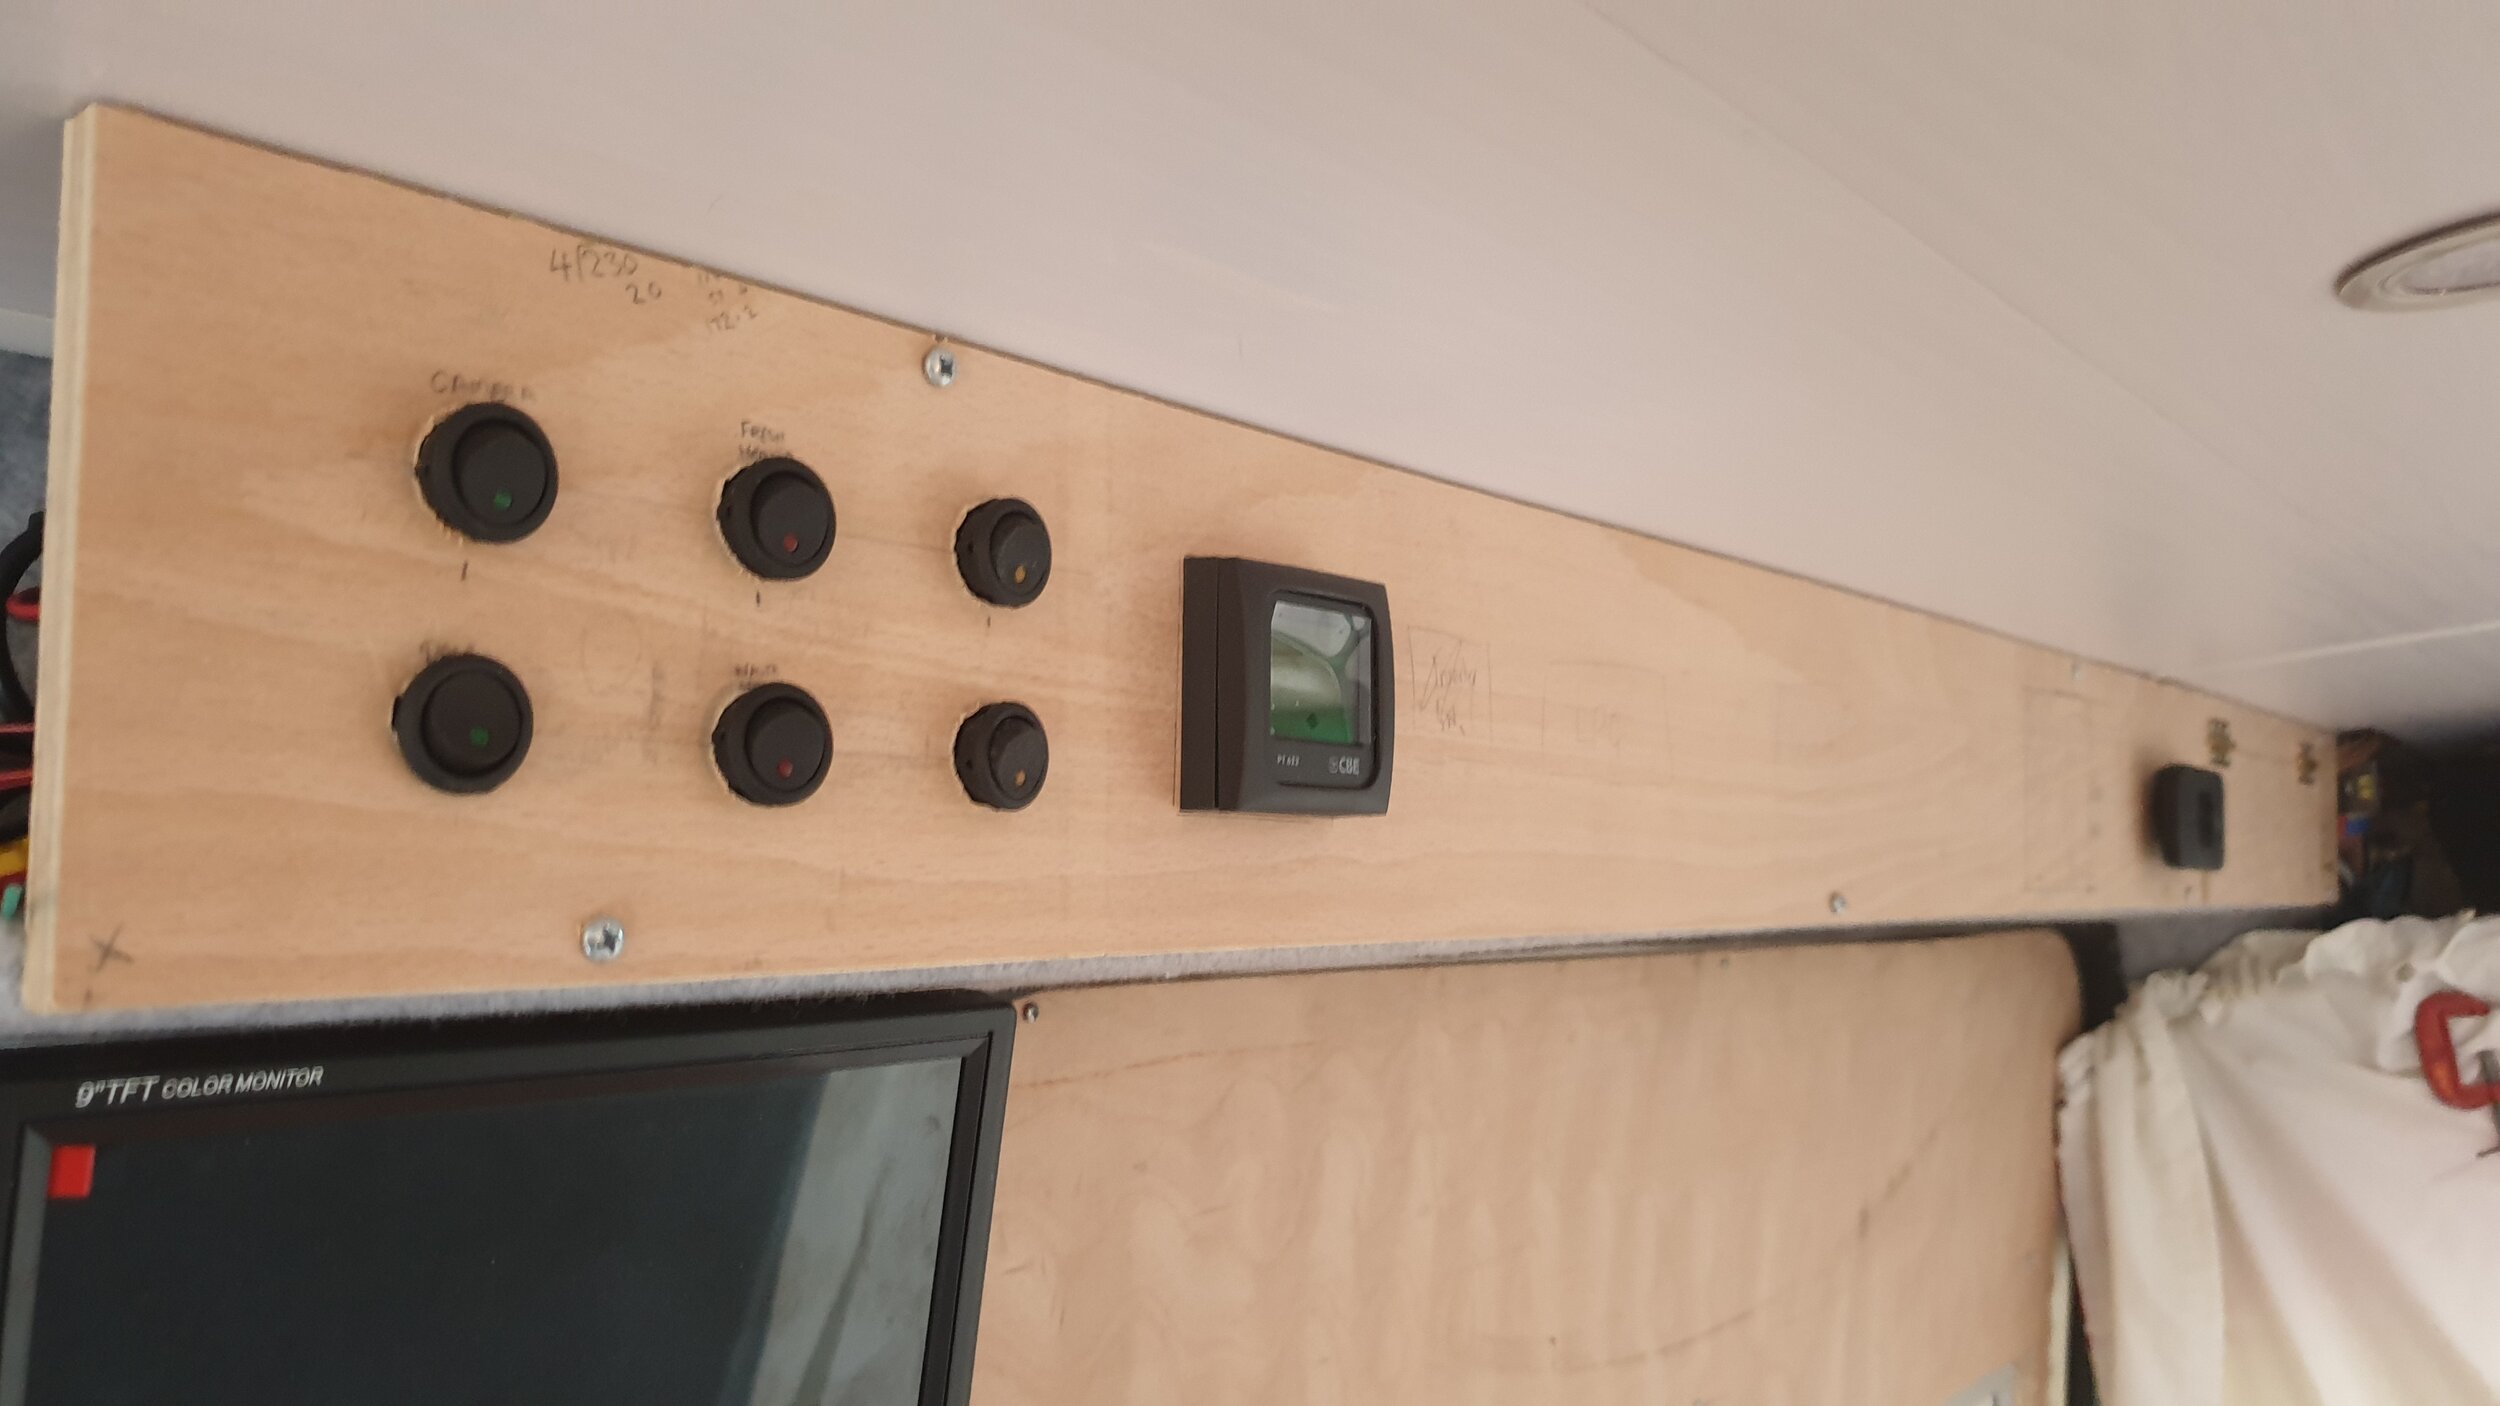
For me, and people who like their gadgets I decided to group all the controls and displays in one area, this is going to be the control centre for the van and it is above the sliding door (see below). Boxing in the gap above the door to give me the room required to hide the cables and connections, this is work in progress as I have not purchased all the controls as yet, which is frustrating me somewhat, as I cannot finish this area of the build.
In Conclusion some tips you may find useful if you are about to build a van -
Try it out regularly, there is nothing like using you van completed or not to find out what works for you or not as the case may be, read previous blog on the adjustments we have made so far from the original try.
If you are lucky enough to have spare cash purchase as much as you can up front, it is great having things to hand as measurements are fair enough but seeing it in place is priceless and having the items to build around lets you tweak just a few mil here and there so can be a space saver too.
Don’t be afraid to change things around to make it work for you, after all you are the ones that will have to live with it.
Next Blog - Items I still need to purchase and build, coming soon , I hope.
I will also be releasing a video tour of the van soon.
,
The Issues We Had When We Used Our Temporary Fit Out /
Hopefully you have read my previous blog, Taking the Van on the Road, so you will understand we went away in our van with a basic fit out a lot of which was temporary in order to understand how we will use the van in the future and see if there were any, lets say bugs, in the setup we had created. In this article I will explain what we identified and how they will be overcome.
The use of boxes and the stacking of the boxes to secure the load was a necessity for this trip as there were absolutely no storage space created in the van as it stood, just the large load area in the back. We had packed everything into the boxes from clothes through to food and also cutlery and tools, initially this all sounded like the best thing to do until after a few stops to make a cup of tea, making dinner and the getting ready for bed it starts to feel like the only box you require access to is always at the bottom of the stack. To counter this you start to leave a few of the more accessed items out, putting them on the floor when moving, but yes they tend to move around so causing issues of their own.
Now the van will eventually have storage cupboards so not a long term problem but for this trip we ended up getting wire baskets that could be hung on the exposed framework within the van, we put items like tea and coffee, cutlery dish cloths etc in these and it did help considerably, so will probably include so easy access holders in the final build.
I had purchased a set of switches to control the electrical circuits in the van along with a number of dual USB outlets so that we could keep all the electronics charged from the 12v electrical system and a nice little volt meter to show how much leisure battery capacity we were using up. All these worked just fine and during the day looked quite nice as all of these items had LED illumination for indication etc. which was fine during the day or evening when we has lights on but when it came to settle down to sleep! Let me put it this way there was so much light in the back I am not sure why we fitted the LED roof lights, the same problem was apparent with the USB charging outlets and the voltmeter.
The initial solution on the trip for the extreme elimination issue was to put some tape over the switch LEDs and to cover the voltmeter with a piece of cloth, ok it was a sock. The USB outlets were not used while we slept and the attached cover put over them, luckily one of the USB outlets was at low level so we could use that one at night when required to provide an overnight charge of our devices.
We really struck lucky with our two temporary beds, which were Jay-Be guest beds, fitted across the van just behind the cab seats, this meant that we did not need to move too much around at night to put them up, however saying that it was not the easiest of tasks but over the course of the two weeks we became quite proficient in the exercise. The added benefit of these beds was that they were very comfortable which was a bonus although they are not suitable for the final fit out most notably as we could not fit them to the structure as per the requirements to register a van as a Motorhome. The bedding was being put in the void above the cab area which was fine but it was a bit of an exercise to get it all pushed into the area,
Before leaving our bedding was packed into vacuum bags to keep it clean and while we visited a camping shop I chanced across some 12v pumps, designed to pump up air beds etc. but had the idea we could use one of these pumps to vacuum down the bags after we had packed up which provided us with additional space as the reduced the volume by at least half, we have yet to decide if we will continue to do this but if we end up short of storage space the pump could prove to very beneficial.
As I mentioned for our water, drinking and waste, we had been given some containers from a friend. The Aqua Roll for drinking water worked fine dropping in the pump when we had parked up and removing it to travel the minor issue is the weight of the container when full, lifting it into the van is not good for your back if you do have issues. The same can be said with the waste water carrier, neither designed to be lifted when full.
Initially we just had a piece of pipe running to the sink for the fresh water but found we were wasting a fair amount of water so we invested in a small tap which helped reduce the flow in a controlled manner. The waste tank also gave us a problem on this trip as; after a road trip going up and down a number of hills we found water had leaked out, the tank was quite full, but it was a bit of a surprise as all the caps were on. After a bit of a clear up, it wasn’t too bad, we found one of the caps was actually cracked which it was why water leaked, from then on it was a matter of emptying the waste tank at every opportunity to keep the level down and so reducing the chance of the water leaking out through the broken cap.
The plan for the water system in the van is to have underslung tanks from CAK Tanks so hopefully we should not have any of the problems identified above.
Another thing we put down for this trip was a plush piece of carpet, as we only had bear plywood flooring and no heating this bit of luxury helped keep the van cosy.
The cleaning of fixed carpet in a van is not the most practical so we are planning a lino flooring but will have a rug or two placed in the van, or so I am told?
That just about covers all the issues we had, overall really enjoyed our trip and can not wait for the next one with a more complete van. On that topic, the next blog will be an update on where I am with the fitout and I may also issue a Vlog as well for those who prefer some pictures. Until them I will say good bye and thank you for reading this Blog.
Taking the Van on the Road /
YES, we decided to go on holiday in our unfinished project.
Read MoreTHE STIP OUT BEGINS /
Work on the van begins.
Read MoreWe Have Purchased a Van🤗 /
We have purchased a
Read MoreTHE START OF OUR VAN PROJECT. /
Why are we going to build a motorhome? Where did we start?
Over many years conversations between my wife and and I have resulted in us expressing dreams to do something else with our lives, rather than the five day week 9 to 5 work with a few holidays breaking up the routine. We have discussed living on a barge, making our way along the canals and rivers of the UK. Buying a piece of land and building a house from scratch just the way we wanted it. Working for ourselves is also an asperation, my wife has started this and maybe my photography could be an outlet for myself. We had carried out a fair amount of reasearch on the topics but circumstances, on the whole, held us back from moving forward.
Since the children have left the fold and we have travelled alone, the idea of owning a motorhome has come to the forefront of our discussions, especially during our holidays in the UK when we have stopped at some idilic locations and sat in the car as the world passed us by enjoying the moment, only to have to move on before we really wanted too due to needing a drink or something else you can't do in a car.
The discussions lead us to look at YouTube which is the goto place to find inspiration and like minded individuals to help enhance understanding of the benefits and downsides of your chosen routes. Posts from those travelling and living in vans started to make us think that this is what we wanted to do, life on the open road and so the journey started .
We began to look at ready built motorhomes, based on panel vans, but the cost ruled ready built vans out for us. Second hand would mean having to purchase a older version, not ideal as we wanted to have a new fit out inside and a more modern base van in order to have a more comfortable ride, also being able to identify a layout that would work for us started leading us to the idea of buying a base van and fitting it out ourselves.
The layout of the van would be essential, the idea of opening the side door and having a seat looking out through it was a must have, as was the inclusion of a toilet and shower, as these were the luxuries we could not do without. Many vans have fixed beds but very early on this was ruled out for us considering you only spend eight hours a day in bed the other sixteen would be driving, sitting and living out of it so available space feels more important, so a seat that could be converted to a bed is our preference.
But before the hunt for a van could begin we had to decide on what we will use as the base vehicle. The van had to be tall enough to be able to stand up in and long enough to be able to fit the items on our ‘want’ list. The choices boiled down to Mercedes Sprinter / Volkswagen Crafter (essentially same body) or a Citroen Relay / Peugeot Boxer again same vehicle along with the Fiat Ducato. The Citroen / Peugeot ended up as our starting point mainly due to the shape of the bodywork, being more square and so giving more space at the top when fitting high level cupboards when it comes to it. That was our feeling anyway, so the hunt is on!